Our Blog
So You Want To Go Racing? Part 4 – It’s Finished!

Finally, an update on this project. From where we left off on part 3, a lot has happened, both good and bad.
When part 3 ended, the RZR was running, but the air intake wasn’t set up and the power was down. We took the RZR to a local performance tuner to have them install a DynoJet tuner (giving us 2-3 ECU tunes we can change on the fly in about 10 minutes) and some clutch work. The tuner ended up charging me a lot more than anticipated, and it’s hard to tell what they actually did to earn that money. It was bad business and I wouldn’t recommend them. But it left the tuner with 163 hp to the tires. Impressive, but from what I’ve heard from the racing community, the power is great, but I’d rather have reliability. The goal was to “wake it up” a little, and give it about 20-25 more hp from the stock 168 to compensate for the heavier weight of a full race car.
I decided to take it to a local testing area, Geiser Loop, for some filming, and the 3 starter gear bolts sheared off, leaving us dead in the water. A quick Google search made me realize that this has happened to a lot of RZR owners, and it was a quick fix, even though I was left stranded.
Running again, I decided to take it to Glamis for President’s Day weekend, and the RZR ran for about 40 minutes, until I tried to make a run up Oldsmobile Hill, the DynoJet tuner was looking jumbled right before this happened, but it went into limp mode, and I couldn’t go back to the stock tune, I had to get towed to vendor row. The performance tune shop was at Glamis at Vendor Row, but they were unable to fix. The RZR was done for the weekend.
Frustrated, I take it to wiring specialists AZ Wire Pros. The RZR was wired using a stock wiring harness, and there were no problems at all before it went to the tuner, but I decided a third set of eyes would help resolve any gremlins once and for all. AZ Wire Pro’s went through it all, calibrated the UTV Racepak dash, installed the belt temp sensor, and informed me that relocating the Voltage regulator was needed to keep it as cool as possible.
After a few more clean runs, the RZR was prepped and I took it on the Arizona Peace Trail. It ran great! The only issue I had was a blown 10a Fuel Pump fuse, probably from a stock harness with a beefier aftermarket pump to work with my 25g Fuel Safe tank. I’ve blown it again and since been running a 15a fuse with no issues.
The RZR was then wrapped and we took it to the UTV World Championships – not to race, but to film some video and take it on the Poker Run. The RZR ran great.
I really wanted to try it again in the dunes, so shortly after I went to Glamis with my sand paddles, it was 96 degrees that day, the temps on the motor got above 183 for the first time, but after a short duning session, I realized 3 of my lower A-arm bolts had broken. Lone Star includes very poor quality mounting hardware and heims!
I get new bolts and take it on a Crown King ride, not too hard, and I break a rear axle! I’ve never broken an axle before and was surprised how easy it broke, I was on the gas when I got a (tiny bit) of air, and my fault, but it gave me concerns about Lone Star axles (with OEM CV’s) being raced with reliability.
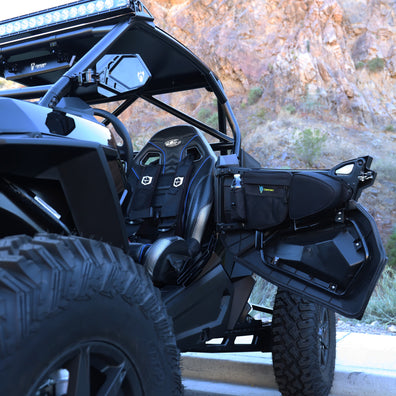
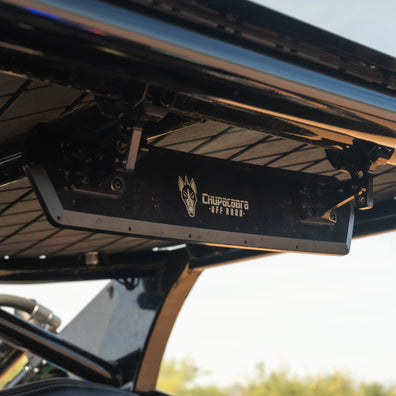
It was time to have Brent at American Engineering tear the RZR down for a final, full prep. The prep included new suspension hardware, custom intake, coating the chassis in Steel It, powder coating a few bits (including the dash), upgrading the axles to SuperATV Rhino 2.0 (they make a specific 3.5” version for the Lone Star kit), along with some fabrication for more storage, including a removable rack for a cooler and fluids, some adjustable sun visors, and also a welded in radius rod box to beef up the rear frame and suspension. We also threw on a brand new set of ITP Ultracross R Spec 32” tires and will use the old ones for spares.
Going through this experience REALLY makes me realize why SxS’s are taking over with Pre Runner, Sand Car and buggy guys. The fact that you don’t need to spend as much on maintenance (especially if you are like me and cannot weld, fabricate, or have in-depth knowledge on wiring) and you can have great experiences off-road, which, to me, means running hard in all types of environments without issues. Being “that guy” isn’t something I was to be accustomed to!
Thanks for watching, Part 5 will have full parts and cost breakdown.
Transcription:
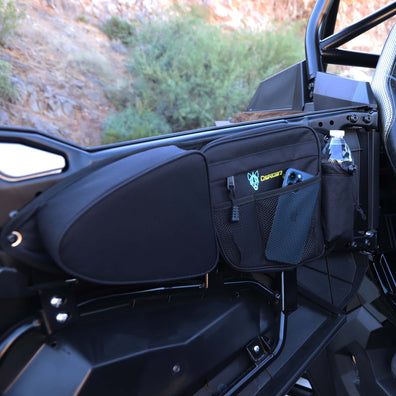
Another Chupacabra sighting man that was a fun day we finally got this thing running good that was at the UTV World Championships race colors catch a little bit of air but we had a lot of issues to get to that point so first let’s go back to early January we went out to do a photo shoot and this is what happened pretty we just had it running great unfortunately we’re stranded dead in the water here cross shooting some video go to fire here up from the fan on just to go back from part three we had the car running it wasn’t running that strong the ECU was just kind of figuring out the air box or the air intake situation which wasn’t all really set up yet so we took it to a tuner wasn’t really happy unfortunately with what happened at the tuner went in for a ECU you know two part dyno jet tuning and clutch shut up the agreement was 1,600 bucks I end up walking Houseman and $4,200 they had a lot of issues they claim with wiring and I was pretty frustrated to be honest but once I got the car back it was making 163 horse that issue is with those the starter gear bolts which is kind of a fluke deal put those in and all was good took it out a few more times and figured it was ready to go take it to Glamis for Presidents Day and if you watched our glados video you know what happens but let’s take it back there real quick old Java cars working just fine trying to make a run up the hill and there’s nothing there trials and tribulations of trying to build a race car then we tried to make a run up old hill and went into limp mode and lost our flash codes yes I’ll know how it goes I’m gladness everyone wants more power and with that comes more headache so so the car has issues the same tuner was out at Glamis and they weren’t able to get anything done back on the trailer back home so decided to take it to a wiring expert I took it to AZ wire pros had them give the car once-over they relocated the voltage regulator got everything dialed and we were back running car was running good took a few more times did a full prep and then I decided with very little time of this car actually went to reliable reliably to take it on the Arizona peace trail for 500 miles in two and half days the car worked awesome it was really cool to finally spend a lot of time in the car two 12-hour days and I took it out to the Parker race course ran the car pretty hard over some of the big loops the built temps got pretty high but no real issues I was I was really excited about it all all the work it took almost over a year to get this thing to where it was and just really happy with I did blow a fuse for the fuel pump no big deal is I’m running a stock wiring harness and a bigger fuel pump we put in just blew a fuse but we were back going in ten minutes had a great ride actually did a lot of low range stuff in this some technical stuff Phase II these travels a lot slower more technical and I anticipated but so the car got it done and had a lot of fun there so cars running good feeling good I go get it wrapped we take it to the UTV World Championships do the little pokhara and cars good and it’s knotted take out the Glamis start doing for a little bit and notice that my lower arm bolts are Brooke so it’s got the Lone Star a long travel kit came with really cheap hardware they were 8.8 metric so not even gradate and behind at this point it also developed a lot of play we knew we were gonna tear down for a full prep but tough lesson learned couldn’t find the right size bolts out of Glamis it was just a day trip so only got to doing it for a little bit and had it back on the trailer and back home once again so now we got the car back brenton an American engineering did a full teardown on full prep got the Stila coating on the entire chassis I’m super excited how I turned out so here with Brent and since we last saw you guys in part three Brent’s made some Brent set some fabrication added a few things to the car so part three Brent we didn’t have the air intake setup didn’t have our storage rack setup additional storage in the back boots up rear suspension so why don’t you walk us through what you were able to do since part three yeah so basically what we did is we put some time on the car and we found out one of the issues was a rear box basically it wasn’t a rear box in there before long so just has a plate that goes in there for the radius rods we fabricated a rear complete box that the gusset in a box in unit for the radius arms and a lot stronger putting better hardware for that back here on the in the back of the car there’s was an open space as I saw that we can put some aluminum in there make a storage thing we can put some tool bags even a cooler it’s kind of multi-use and then up front we’ve built a better in front of that a rock that’s multi-purpose that has a oil container that we can put some fluids in there so when we do race it we have or go on long trails we have spare Luud we included this air intake on here this this is a dual-purpose carbon intake that goes to the air intake on the air cleaner then the other one goes to the belt which provides inducted fresh air into the belt box we’re still gonna get some custom door bags made so we can put our drill or impact in the door bags as well as some storage underneath the passenger seat so really gonna have some storage not only for racing but for some bigger longer rides like the AZ piece trail so speaking of long rides initially we thought we were gonna make this just a big prerunner that we could race we talked about doing a roof rack but if you’ve been watching the youtube channel I went to an event in February and miraculously won a new razor so now I’m gonna have two vehicles now this isn’t my do at all we’ll have them together I’m thinking about getting a four seat or if not I’m gonna get a roof rack and have a lot of storage spare parts everything you need for those big adventures and both those cars are gonna be together on all these type of big trips so decided to keep this as it is added much storage as we could still a race car but still capable of knocking out some long rides down in Baja Arizona or wherever our venture might take us so the car is fully prepped brentt’s marks all the important suspension components they’re all torqued I’m feeling really confident like it’s really time to go test this thing out at a smaller local race or do some clutch tuning and get ready to hit our first race later this year he also welded in some Sun visors which is gonna be nice for those days we’re driving towards the end of the day and that’s pretty much it tune in to part 5 where we’re gonna do a full parts breakdown along with a cost breakdown so in case you’re interested in going racing you get an idea of what it took to get this thing ready both money time and effort I hope this video series was informational and give you some insight into what goes on if you want to take that leap from a regular car to a full-blown race vehicle that you can pretty much do everything with thanks for watching this video if you guys like the content please like and subscribe tune in soon for part 5 and we’ve got a lot more great content coming your way.














LEAVE A COMMENT