Our Blog
X3 UPDATES | SWITCH-PROS, DUAL BATTERY, & BAJA DESIGNS RTL-S | CHUPACABRA OFFROAD

We go over the latest additions to the X3; the Switch-Pros 9100 as well as a dual battery setup and Baja Designs RTL-S chase light! Switch-Pros: https://store.switchpros.com/sp9100-s... Baja Designs RTL-S: https://chupacabraoffroad.com/product... Dual Battery kit: https://theutvpros.com/products/can-a... Switch-Pros Controller Mounting Plate: https://chupacabraoffroad.com/product... Torque V2 Beard Seats: http://www.beardseats.com/shop/torque...
Transcription:
(0:00) Hey everybody, Nick Olson, Chupacabra Off-Road. We're back here in the desert with the Can-Am X3. We've been adding a couple new accessories to it. We're getting this thing ready. We're doing a little shakedown run today for a big trip we've got coming up. But let me walk you through the new upgrades we just added to the car.
(0:12) [Music]
(0:20) First things first, new seats. Gotta be comfortable. These are Beard V2 seats. Beard reached out to us, they wanted to collaborate, wanted to send a set of seats and have us test them with their new harnesses. We installed these things right before the sand show and have been putting some miles on them. Me, my staff, my dad, people of different body shapes and types, playing with some of the adjustments. We're going to do a separate video on that as a review and give you some more information, but it's going to be nice. I got a big ride coming up and it's going to be nice to have some comfortable place to be for 12-hour days that I've got coming up here. I'm really liking the harnesses so far. I'm liking the adjustability and coming from years of being a Polaris guy, it's nice to have some adjustability because this car does sit quite a bit different and I like some of that older Polaris feel, but a lot of you guys like that low slung Can-Am sand car style, if you will. So you have a lot of adjustability with these seats. We'll get into that in a separate video, but so far a couple hundred miles are broken in. They're feeling good and I'm digging them.
(1:17) Alright guys, so like I mentioned a big ride coming up. I was on a ride with this group I'm going with. We're doing Arizona Peach Trail a couple years ago. Someone had an issue with their vehicle, the battery clunked out on them. Well, my buddy got a Can-Am with the dual battery kit, was able to take one of his batteries, save his buddy's day. Now something I've been thinking about, I know the charging systems on these things aren't that great, so we added more light, which we'll get to in just a second. But just something as a piece of mind I wanted to add. So we went ahead and added a dual battery kit. Now this kit we purchased from one of our dealers, UTV Pros in Southern Utah. The kit features two batteries and then they make a nice mounting bracket where it bolts right in. Clean install, mounted right up to our Switch Pros, which we'll also get to in a second, which is one of my favorite upgrades. And now we've got more peace of mind. We're just running all of our accessories. We're over 14 volts, so it's good to know when you're on a long ride you've got an extra battery. I don't have a big stereo in this thing, but you know it's just, it's great to have it and something that most all of you Can-Am guys do. So we'll link to those parts description below. Here's what it looks like all installed, but didn't take up any more room for the passenger. Looks clean and now we're ready to add some more accessories.
(2:42) Alright, so now we've got the extra power from our dual battery. We wanted to add some light in the back. I've had this on my previous car, my 2019 Turbo S. I really liked it. It's the Baja Designs RTL-S rear light bar. Now what I like about it is with the S model, you've got ambers and you can also turn those into blinkers. So the few times I am on the road, I can double click it on my Switch Pro, which we'll show you in a second. Makes it nice as a blinker. You've got running ambers, you can turn those on or off of course, and then it's got a work light in the middle, which also is set up as a strobe function, which we'll show you how to do that here in a second too, which is very visible in the dust. So like I mentioned, I got a big group ride coming up. I think we've got 10 to 14 cars. There's going to be a lot of dust. I'm going to be near the rear, so it's nice to be seen. Safety element, if someone's coming up on me, catching me, it's that type of thing that I really like to have it. So excited to get this thrown on. When we had the cage done, we knew we were going to do this, so the cage was already tabbed for it. So pretty clean install.
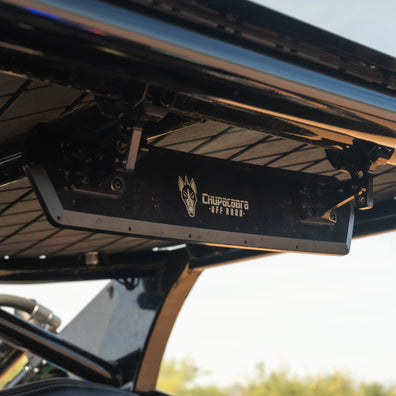
(3:36) You're also going to notice in the rear, if you've been watching the channel, this car has been set up with just one rear whip flag, which we were testing our flag mount here on the back of the cage. But now we've switched to adding our 5150 187 whips. We've got two four footers. We mounted them up here on the roof. I just think it's a clean look. It looks good to have a couple of them and brought the wiring right here from the Switch Pros. We ended up moving our antenna over here over to the side. So we're kind of playing around with it. We wanted to continue to continually use our antenna mount that we sell, but being with the light bar, it might not be the best that we might move it around. We might put it on the roof, just want to make sure we don't get any interference. That's another reason why we're kind of shaking things out, making sure everything sounds good for right now. So that's kind of the updates of the rear of the vehicle. Now we can be seen, you guys are going to be able to see us and now we've got the B2G storage. Like I said, you guys have seen, we like to do all different types of riding on the channel. We were rock crawling a few weeks ago. I was in the dunes a couple days after that. Now doing a big adventure ride and that's how I think about setting this car up. You want to have or all my vehicles stuff where you can do all of those things that you're safe. You've got plenty of light no matter what you're doing and that's kind of how I really came up with the designer, the idea of the X3 B2G storage compartment and how we think about a lot of our product design. And I learned a lot when I do these big trips, which I'm excited for because you spend 12 hours in the car and you know, like right now we're kind of playing around with the suspension. How does it feel? You know, we have a pretty good baseline setting. We're going to be doing some more suspension upgrades here pretty soon and I really enjoy that stuff guys. I love geeking out on it as you guys probably know by now, but it's fun as this X3 is getting really, really set up as a whole.
(5:15) I mentioned Switch Pro a couple times. Let me show you how we mounted it up. You can see where the Switch Pro has been mounted on the left side. This is a little mount that's made by Geyser Performance and a lot of cool options of what we can do right here. First, I got to give a shout out to Jacob, the guy who's on the camera right now because he's the one that did the install and everything did a nice job. But we did the Switch Pro over here. So Jacob had to move a couple switches over here and I'm leaving this open because I'm going to use one of the products we used to sell, a GPS mount and run an iPad for this weekend. So I have my files where I can visibly see. So for that reason, I didn't want to do the Switch Pro mount over here and then we talked to Laura and the gang over at Switch Pro and Laura said that they had some issues with some customers trying to mount them on the steering wheel because I thought about getting one of those cool wheels and I thought that looked kind of cool and racy, but she said, you know, it might not be the best Nick. So that's why I decided on this. I think this looks great. The little plate the guys are made, I think looks really clean.
(6:32) So real quick guys, if you are going to roll the mounting bracket like this, guys, the one you do have to trim some of the ridges is to get it to mount flush. So over here, we've got all the accessories. We've got the left and right amber, which can be double clicked and that turns into a blinker, which is like I said, nice for here in Arizona. Right here in the center, I've got the light bar, which is my 10 inch on X6 for the front here on the shock tower. Here are my Chupacabra mirror lights, of course, and then going back to the RTL-S. Down here is the backlit. This is the center work light. So it'll be solid and then we change the feature on the app where it's in a strobe function. I like that. I'm running that here on big trips. I honestly, I ran that out in Glamis and all that. I just think you can really be seen with a strobe out there. So like that setup and then we've got the whip here. We just ran the whips on a switch as well, so we can turn those on and off. Then we've got two open here, which might be some seat heaters. I had those on my old car and absolutely loved it. So maybe we'll do that or except you guys, I don't know, we'll add more, but a dome light, something else like that be easy to throw in here.
(6:32) So over here, we've got all the accessories. We've got the left and right amber, which can be double-clicked and that turns into a blinker, which is, like I said, nice for here in Arizona. Right here in the center, I've got the light bar, which is my 10-inch OnX6 for the front here on the shock tower. Here are my Chupacabra mirror lights, of course, and then going back to the RTL-S. Down here is the backlit. This is the center work light, so it'll be solid and then we change the feature on the app where it's in a strobe function. I like that. I'm running that here on big trips. Honestly, I ran that out in Glamis and all that. I just think you can really be seen with a strobe out there. So, I like that setup. And then we've got the whip here. We just ran the whips on a switch as well, so we can turn those on and off. Then we've got two open here, which might be some seat heaters. I had those on my old car and absolutely loved it. So maybe we'll do that, or, except you guys, I don't know, we'll add more, but a dome light, something else like that, be easy to throw in here. So six out of eight are used. We moved over the stock headlights, which also have the Baja Designs kit that still runs off the stock switch. So if you've seen our lighting video on this car, we've got that as an upgrade as well, and we moved that switch over to here. And then you've got your override switch, your rock crawl lock, and your front diff, and all your other stuff over here on the right side. The winch was over here, Jacob moved it down here to the bottom with the PCI radio mount. Honestly, guys, I would have gone for a different PCI mount because you can see it here, the start and stop button is right behind the gear selector, and I really don't like it. But it's one of those things where until you install it, you don't really know. I thought we might have done some more switches down here, which is why I did this. So maybe we can clean it up and do the different mount, which will get these holes out of here, move the start button out of the way a little bit more. But it is what it is for now. Like I said, I'm gonna do my dash mount here for my iPad, get my files plugged in for this ride, and then I've got a setup now where I can really see very easily if I'm in the dunes at night so I'm not taking my group around in circles like I've been known to do. And I've got just things that are easy to reach and I also like in the center here when you're riding with somebody, if they're helping you co-ride or navigate, they can see as well too. So those are the reasons why I did the switch pro over here. I've seen a lot of cool setups. I mean, with X3, you got a lot of options, which is very cool, and that's what we went with. So comment below if you guys have done similar setups and if you like what we did or you did something different that you thought we should maybe do for next time. I'm feeling like this X3 is dialed. I'm ready for this big adventure trip. I've got plenty of power here with the dual battery kit. Switch pro is a clean way to do it. We've got some room for some future accessories if that does happen. The rear light bar is a nice upgrade mainly for safety and on big groups, nice to have it as a work light in case we ever needed it. Clean setup. I love how Baja Designs integrated it. We're big fans of Baja Designs. You can purchase any of the Baja Designs products on our website, chupacabrafroad.com. Thanks to all of you guys that watch. A lot more content coming out your way and we'll see you on the next one














LEAVE A COMMENT