Our Blog
Chupacabra Offroad RZR Door Feature Benefit & Install

Looking for the best RZR door inserts on the market? Chupacabra Offroad tested the competition and added a few changes to make our inserts better than the rest. Our installation tips also help you ensure your doors are adjusted properly to reduce overlap of the door to the existing bodywork.
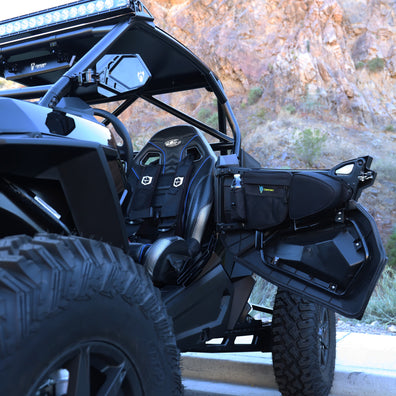
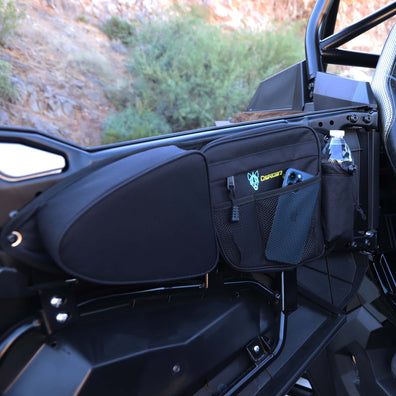
Our door inserts feature a higher quality rubber molding with a deeper, wider profile, and stronger adhesive, to last longer, and stay bonded and attached to your doors for years of rides, washes and more. Most RZR owners want door bags, and with our RZR door inserts, this is easy to do, as we pre-drilled the aluminium doors, and included additional hardware, so you can easily mount up our door bags with having to take a trip to the hardware store.
Transcription:
Looking for a door insert with some better features than what’s out there on the market check out these new Chupacabra off-road lower door inserts for Polaris RZR 1000s 900 s 1000 and turbo models so these lower door inserts have been around for a while and I’ve used a competitor’s version for the past year I liked them they’re great for the price there’s a couple things I wanted to improve first the rubber molding wasn’t very well it didn’t hold up and secondly when you went to install our inner door bags I had to drill out holes and head to the hardware store to get longer screws to make it all work starting off with the molding we tried several different types and one with the longer stick your adhesive compound and when you use a heat gun it really keeps these things on better for a longer period of time so these lower doors are all pre-drilled for our chupacabra door bags so if you buy both pieces you’re ready to go without having to do any drilling or needing any additional hardware all comes included in the package also included in the package are the upper triangle cover if your razor does not come with a molded piece like this for s900 2015 and newer S 1000 XP 1000 and RZR XP turbo and Turbo S models so if you’re looking for the best lower door insert and door bag combo on the market look no further than the chupacabra door bag and lower door inserts for flares Ranger Nicholson chupacabra off-road and today we’re installing the chupacabra lower door inserts onto this razor turbo so when you open up the box you’re gonna see both the right and left lower door a couple different upper triangle sections depending on which razor you have is what will fit as well as mounting hardware and the rubber molding which will go around the outer perimeter of each door you’re going to need a couple different size Torx wrenches a t40 a t30 and a t25 or a multi-tool like this which has all three a five millimeter allen key and a set of cutting pliers just to cut the molding to fit first thing you want to do is take out the rubber molding you’ll notice that there’s a shorter and a longer side and measure out the distance that you’re going to need before you make your first cut if you look down here I made a mistake just to prove the point of what you don’t want to do I cut the long piece too short to where I came short now to use a second piece up here so make sure you go ahead and start from the very top and work your way all the way around before you make your first cut when you look at the molding you’re going to see a longer side versus a shorter side and you’re gonna remove the red adhesive cover when you start to apply it you’re going to want the taller side on the outside of the door the reason for this being is this adhesive is going to stick to the outer door when you use a heat gun it’ll really help it adhere and not fall off for long muddy rides after pressure washing etc so once you start applying this like I said use a heat gun for best results you can really get these corners to stick down and bond with the aluminum which is going to allow their molding to just last and stay on the doors for a long longer period of time so this is what the rubber molding looks like when it’s all installed and a heat gun is used you can see the smaller edge here is on the inside and now we’re ready to go ahead and install these onto the razor so we’re going to install these today along with our chupacabra door bag so we’re going to loosen up the five screws needed to install the door backs we’re going to loosen this one for the front of the door mount and we’re going to loosen all four of these door mounts because we’re going to readjust the whole door to allow it to fit better once the lower insert is installed so now I’m going to loosen the four Torx screws that hold the door onto the door frame [Music] you’ll notice once all of these are loosened up you can move the door and the reason I’m doing this is that we’re gonna adjust the door back as far as we can so that it closes properly and the doors fit up snug on the bottom which I’ll show you in just a second so one tip with these door inserts they fit the best down here in the bottom when the door is adjusted as far back as you can possibly get so what I like to do are loosen up the door latch move it as far back as you can and then adjust the door accordingly once your door is installed this is going to ensure that the insert fits smoother and doesn’t hang over here on the front so step one we’re gonna take five millimeter allen screw split washer and a flat washer along with the clip-in nut I’m gonna take the lower door insert and go ahead and install this one first uninstall and reinstall this Parkes t40 screw so once you remove the t30 front corkscrew go ahead and install a small washer now notice the door has a slot to adjust up or down so this is slotted I like setting it up right about the middle height wise so here you notice the back of the door is underneath the inner t40 and get these up close but definitely leave them loose because we’re still going to adjust the door so now we’re going to go ahead and mounting the chupacabra door bags which are optional if you’re gonna go ahead and do that you can use the stock upper two innermost Torx screws to go ahead and get it started and now to mount the lower door bags with the three screws use these five millimeter allen key screws with a split washer as well as a bigger round washer so now I’ve got all five bolts secured for the door bags you’ll notice that the four t40 Torx screws are still a little loose the door moves around here I like mounting it up double-checking how the door fits like I said moving it back further is gonna allow this line here to fit nice and smooth and not overlap too much then take your tea for tea go ahead and once you have your 240 go ahead and tighten up these four Forks so this is what it looks like when they’re all installed and adjusted latch still works well and a closed seam is nice and tight without overlapping door bag is installed so this is a 2019 razor turbo less velocity it comes with a nice molded upper triangle section here some razors do not the box includes the different shapes to fit if you’ve got a razor 1000 per bow s9 owner s 1000 go ahead and pick the right shape and use the attached hardware to go ahead and mount that up one side note these door lowers do not fit to 50 inch trail models that has a narrower door a different door design and they will not fit well we hope this install video made it a little bit easier if you have any questions shoot us an email sales at chupacabra offroad.














LEAVE A COMMENT